


Jotform’s Take Photo widget makes it straightforward for customers to snap and add pictures proper out of your kind, no additional steps wanted. Whether or not you’re doing inspections, gathering occasion pictures, or simply including a visible contact to your submissions, this helpful software will get the job carried out. It really works easily with a pc’s webcam or a telephone’s digital camera, so capturing the second is fast and straightforward.
Observe
The widget wants entry to the person’s digital camera. They’ll be prompted to permit permission by their browser or machine—in the event that they deny it, they gained’t be capable of take a photograph.
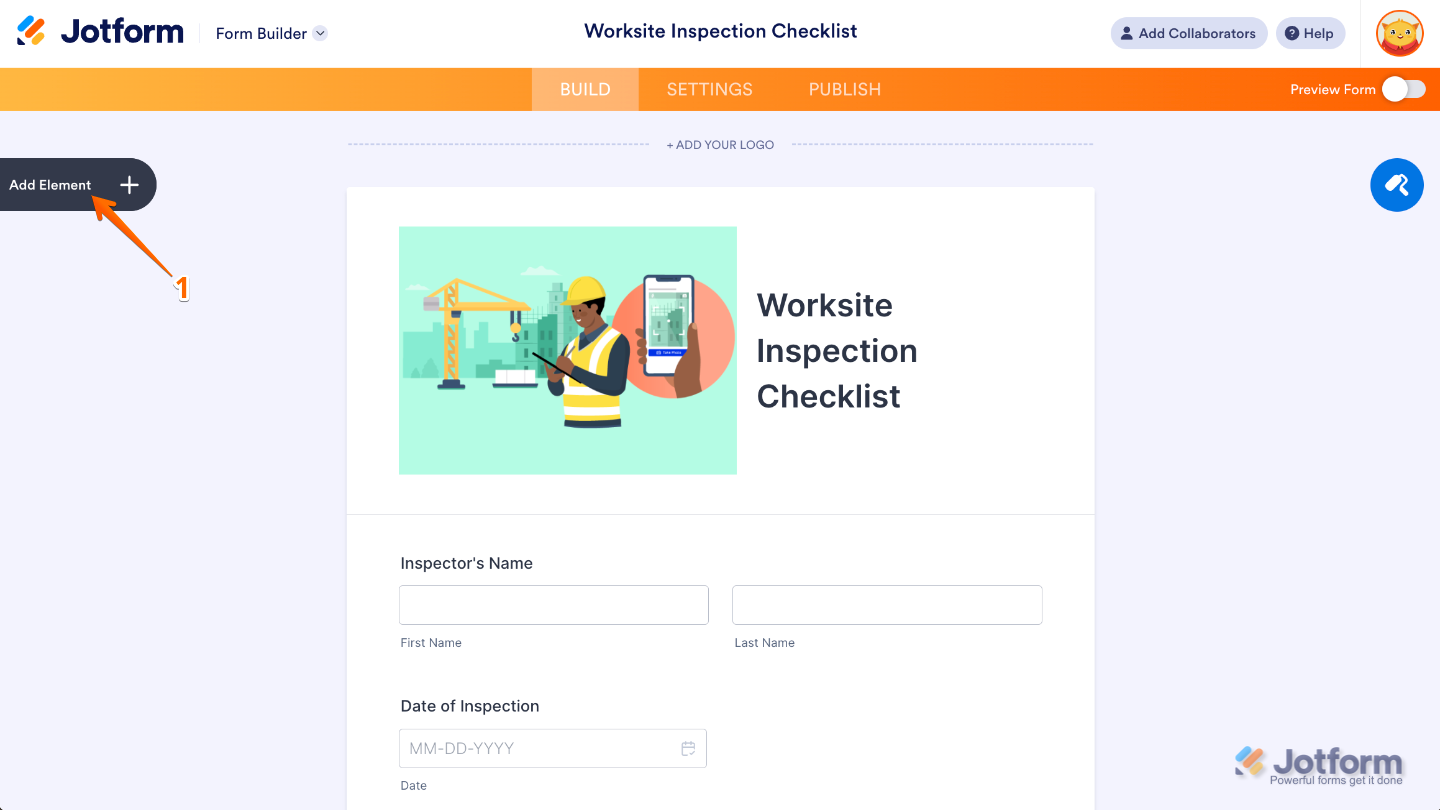
With only a few easy steps, you’ll be able to let customers take and add photos straight out of your kind, no additional instruments or tech abilities wanted. Right here’s the way to do it:
- In Kind Builder, click on on Add Ingredient on the left aspect of the web page.
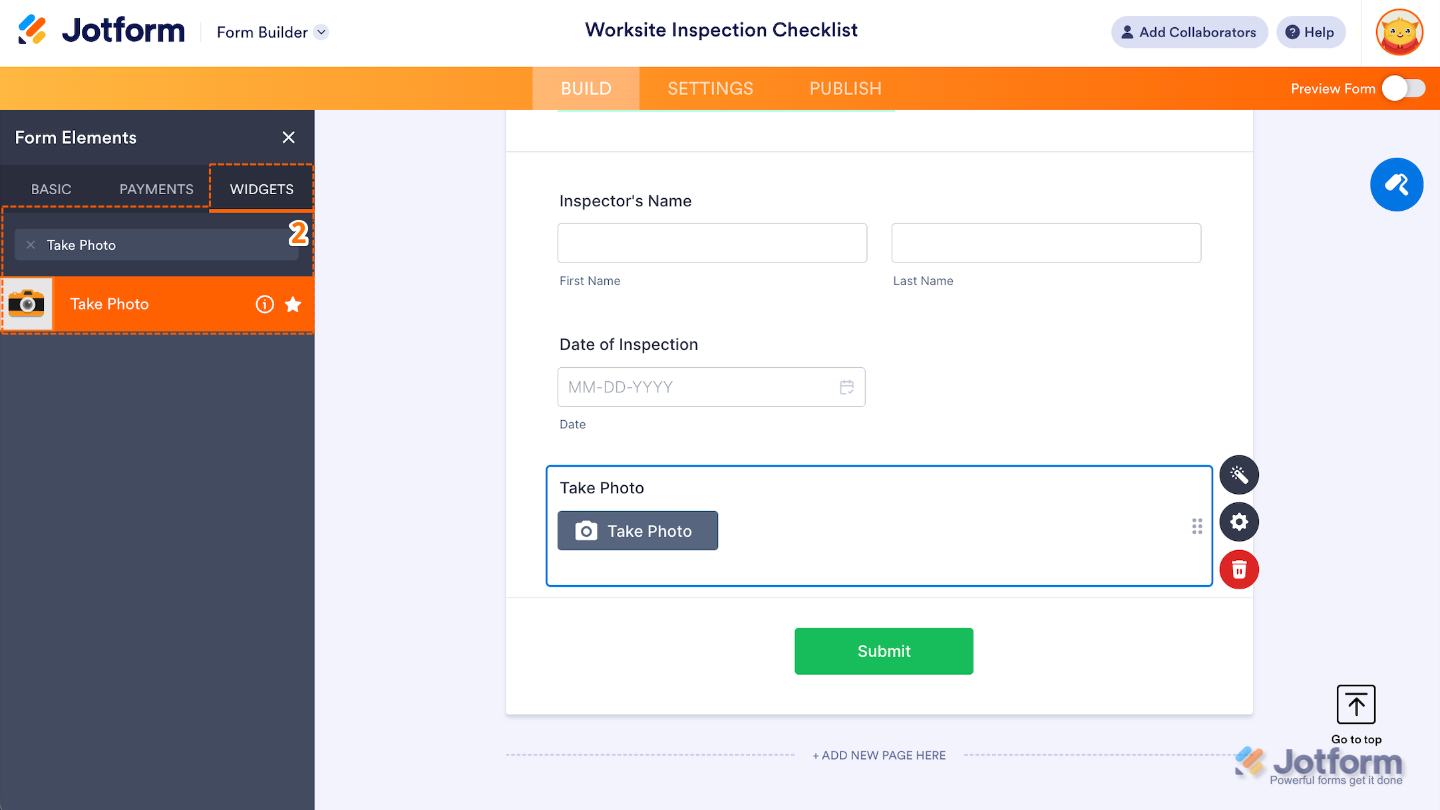
- Now, within the Kind Components menu, beneath the Widgets tab, seek for Take Photograph after which click on on it. Or, simply drag and drop it to the place you need it to be in your kind.
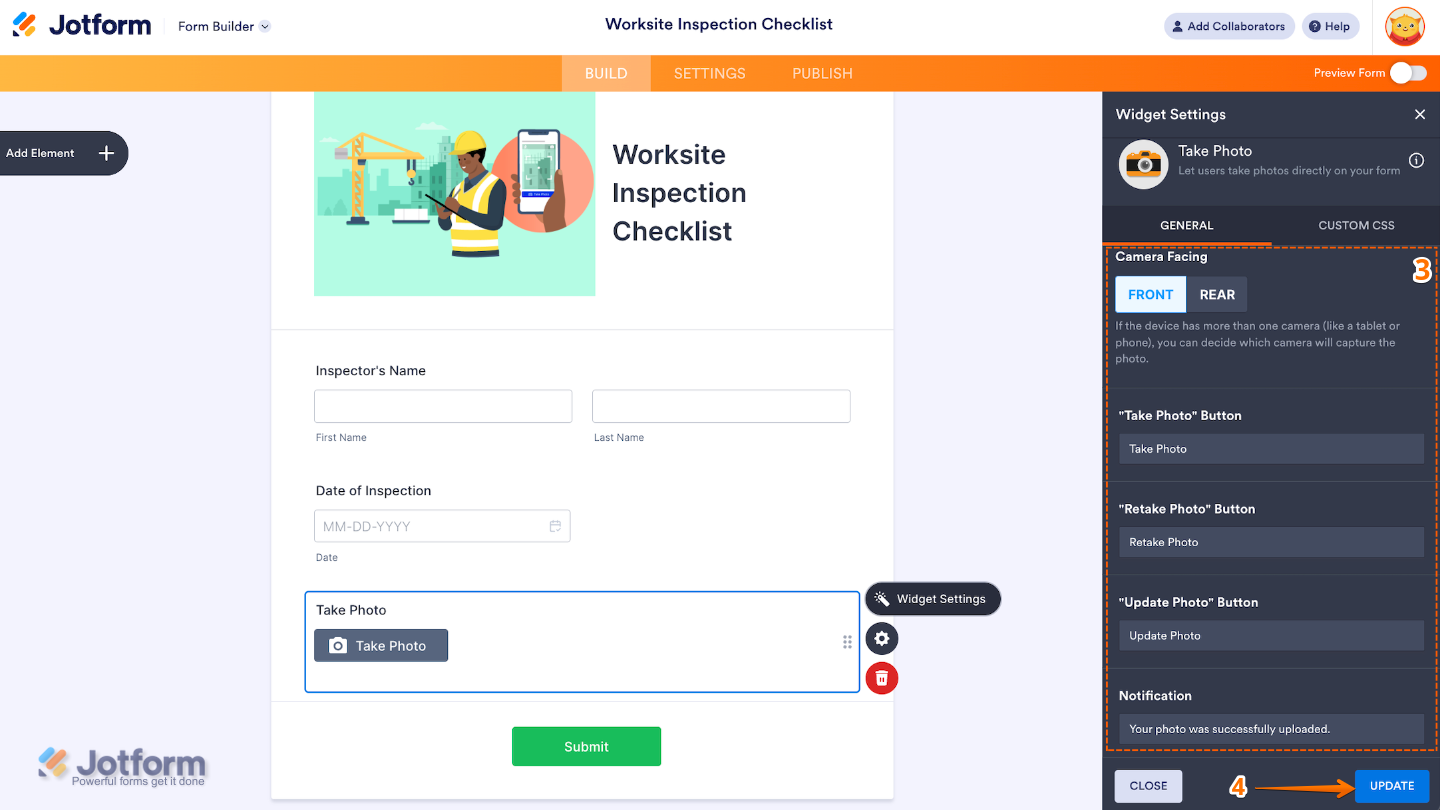
- Subsequent, within the Widget Settings window that opens on the suitable aspect of the web page, beneath the Normal tab, arrange the next issues:
- Digicam Dealing with — Select whether or not to make use of the entrance or rear digital camera.
- Take Photograph Button — Customise the textual content for the Take Photograph button.
- Retake Photograph Button — Change the textual content for the Retake Photograph button.
- Replace Photograph Button — Edit the textual content for the Replace Photograph button.
- Notification — Arrange the textual content that’ll present up when the person efficiently provides the photograph.
- When you’re carried out, click on on Replace.
That’s it! You’ve efficiently added and arrange the Take Photograph widget in your kind. Now, customers can snap a photograph proper within the kind and ship it together with their submission. Wish to see the way it appears in motion? Try this Demo Form.
To additional customise your Take Photograph subject look, simply click on on the Gear icon to open its properties. For a full breakdown of the way to do it, head over to our information on [Ongoing Redirect Link].
Notes
- For superior styling, you’ll be able to add your personal customized CSS beneath the Customized CSS tab within the widget settings and elegance the Take Photograph subject. For a full breakdown of the way to do it, head over to our information on How to Inject CSS Codes to Widgets.
- Images are robotically connected to submissions—no additional add steps wanted. As soon as a photograph is taken, it’s saved with the shape response.
Professional Ideas
- Use the Required choice if you wish to be sure customers embody a photograph earlier than submitting. It’s excellent for inspections, experiences, or verifications.
- Regulate the widget’s peak within the Superior tab to present customers a greater view of their photograph earlier than submitting it.
- Add a transparent, pleasant label to information customers by the method.
- Take a look at the shape on totally different units earlier than publishing to verify the widget works easily on each desktop and cellular.

Source link


![[Bombshell News] Consultants say we’re DANGEROUSLY near a recession 🚨](https://i.ytimg.com/vi/DvnKvkjdsMc/maxresdefault.jpg "[Bombshell News] Consultants say we’re DANGEROUSLY near a recession 🚨")

